
Learn Anime Art
– in the Fastest Way Possible
Don’t leave your improvement up to chance or random tutorials.
Learn with a curriculum designed to level up your art quickly –
and save yourself countless hours.

If we haven’t met before – hey, I’m Ori 👋
I started art late. I began learning it in 2018, as a uni graduate with a teaching degree that was completely unrelated to art…
And I had zero drawing skills, and zero followers.
But I loved anime art, and I wanted to get good enough to draw it professionally.
So I did what most people do: I watched tons of tutorials and drew a lot…
But my art didn’t improve.
I couldn’t draw anything like the artists I looked up to.

Feeling stuck and confused, I became obsessed with figuring out how to actually improve.

As someone who previously studied to become a teacher, I remembered that there was a science to learning 💡
So I started reading all the books and research I could find on the topic, desperate to figure out the best methods I could use to get good at art.
And since I also understand Japanese, I pulled ideas from both the English and Japanese art worlds.
✏️ Then I experimented and tried out all methods, kept what actually improved my drawings, and threw out what didn’t.
Over time, I started putting together my own practice and learning methods for art.
Things finally started to click…
And my improvement speed began to accelerate.
Fast forward to today, and I’ve reached a level where I’ve been able to:
Work with major companies
Win awards
Build a following of 300,000+ across social platforms
But looking back, one of the biggest realizations I had was that:
You don’t need more information.
You need the right information – and guidance to apply it.
Most artists aren’t stuck because they’re lazy or “not talented.”
They’re stuck because they’re drowning in information…
but don’t know how to apply what they learn, or what they need to do to actually improve.
🔁 The usual loop looks like this:
Watch a tutorial.
Feel inspired.
Try it once / draw for a bit.
Get stuck.
Watch more tutorials…

I also fell into that trap – and looking back, I would’ve gotten to where I am now much faster (and with way less frustration) if I had the right structure from day one.
That’s why I spent over a year making the Anime Art Accelerator.
It’s the course I wish I had.
I designed the curriculum specifically to give you the right lessons and practice methods to help you:
Break the loop
Avoid the pitfalls that
waste your time

Improve as fast
as possible

7+ years of experience
One epic, self-paced course.
How it works:
🎬 Concise lessons
You’ll learn only what matters – focused on the critical 20% that creates 80% of the results in anime art, so your time goes into what helps you improve the fastest.
And even when we cover fundamentals, everything is taught in the context of anime art – so you can apply it immediately.
📜 Quests
You’ll get quests and practice methods that tell you exactly what to do, so you can:
Learn → Apply → Level up
You’ll save time by avoiding the wrong practice, and quickly turn what you learn into real skill – instead of getting stuck in theories.
🖼️ References
You’ll get hard-to-find stylized references and cheatsheets you can use to study and draw, so you can learn faster, draw more accurately, and get unstuck.
📚 A Companion for Your Entire Art Journey
This course isn’t just “one-and-done.”
It’s a resource you can keep using throughout your art journey – because the practice methods and references stay useful long-term.
As you go through the course, here's a taste of what you'll learn ✨
Draw the Head from any Angle
You'll learn my revamped Box Method – a step-by-step, structured approach that helps you draw the anime-style head from any angle with confidence.
Master Your Motivation
You’ll learn how to beat procrastination, overcome perfectionism, and build lasting motivation through the Motivation Mastery module – so you can stay consistent with your goals and finally achieve them.

Draw the Full Body with Confidence
You’ll learn how to draw the entire body using the Turnaround Method, so you can create full-body poses without getting lost.
You’ll also get hand-drawn, stylized references for each body part (including the head), plus the full figure rotated from multiple angles – so you can save time, learn faster, and draw more accurately.
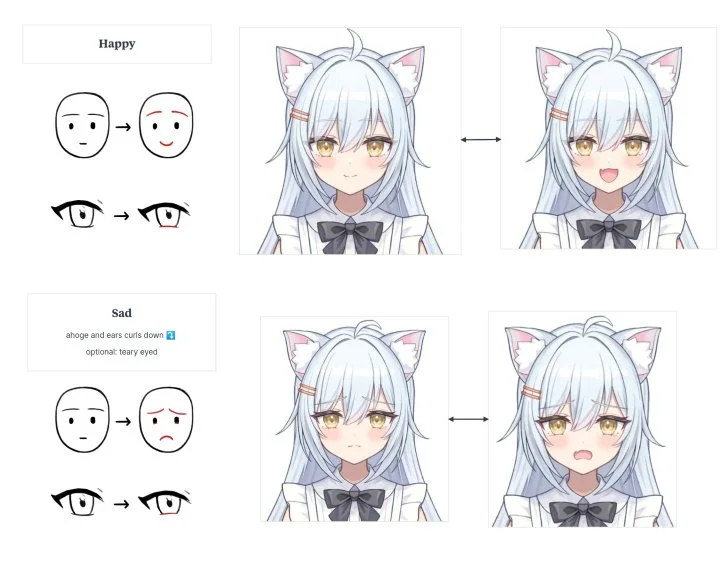
Create Expressions Full of Life
You'll get my Expressions Cheatsheet, which you can easily follow to create expressions, so you're not wasting time trying to reinvent the wheel each time.
Master Anime Style Coloring and Shading
You'll learn my updated 1–2–3 Shadow System – a simple step-by-step approach that lets you nail stylized shading and coloring every time.
Create Stunning Illustrations
You'll learn the Foolproof Illustration Process I use to take a piece from idea to stunning final render – so you can create your own masterpieces.
You'll also get lessons and timelapses that break down every single step, plus a full painting file with all layers intact, so you can learn deeper and faster.
Here’s how the Accelerator will shortcut your learning curve 👇
🔰 If you’re a Beginner…

You’re at the most exciting – and also the most confusing – part of the journey. Drawing feels fun, but you feel lost and unsure what you should be doing to improve. You’ve watched tutorials and maybe even bought a book or two, but you’re not seeing the results you want – especially with anime-style art.
This course will give you:
a clear, step-by-step path for getting good at anime art, learning the skills you need in the right order
quests that tell you exactly what (and how) to practice
stylized references to help you learn and draw anime art faster
So you can get through the beginner phase with the best possible start, build the skills that matter, and improve as fast as possible.
✏️ If you’re Intermediate…

You can draw okay… but your results are inconsistent. You feel stuck at your current level, or you have “holes” in your drawing or painting skills – but you’re not sure exactly what.
This course will help you:
fill in important gaps in your knowledge
improve all of your skills core to anime art
learn practice methods that will help you break through plateaus
So you can create good art consistently and finally break through to the next level.
💪 If you’re Advanced…
Your skills are solid overall, and you know what good art looks like and how to create it. But one or two weak spots keep holding you back – or you want better practice methods so you can keep improving past your current level.
This course will help you:
learn the best methods for overcoming your bottlenecks
solidify your drawing and painting skills
keep improving consistently and avoid stagnation
So you can bring out your full potential as an artist.
Just to be clear though:
This course won’t magically make you good overnight ❌
Nothing replaces the work.
But it will remove the guesswork and give you the right methods, so the work you do put in creates real results – as fast as possible ✅

“…Especially for those on a "self taught artist" journey this will help immensely.”
guryfrog
Freelance Illustrator
@guryfrog • 12.5K Followers
-
“What this course does differently and really well is getting you into the mindset of an efficient self learner. With so many courses available these days it can become a paralysing experience trying figure out what's "best". This course dives into the core fundamentals of how someone learns, what methods they can use to efficiently learn and apply the information given.
<img src="https://images.squarespace-cdn.com/content/6199073473e2f921c31c3238/a71e8f41-7e79-4513-8501-478be28fe5c4/Gury_4HeadFreeSketching_9PackagingBoxPlacement+v3.jpg?content-type=image%2Fjpeg">
Because of this, I think this course is best for those in the beginner to intermediate stage. It's especially helpful for those that feel lost and no matter how much they practice they somehow can't push themselves to the next level.
<img src="https://images.squarespace-cdn.com/content/6199073473e2f921c31c3238/6dfcae67-3aef-4262-9979-8370995fcf81/gury_4FullHeadTurnarounds_3.jpg?content-type=image%2Fjpeg">
As someone who is a self taught artist struggling to break through to the next level, I highly recommend going through the course from beginning to end, emphasizing on the mindset and tools given in Modules 1 and 2. After completing it, I found myself lacking not in skill but rather mindset, I realised it was how I tackled learning and my relationship with art that held me back.
Modules 1-2 is the foundation to approaching art, modules 3-9 is what I found to be the core. It teaches you the blind method to learning anatomy, value and color, which I find quite difficult and challenging.
<img src="https://images.squarespace-cdn.com/content/6199073473e2f921c31c3238/de2c1e1f-53f3-41da-bfed-131d85cfb007/gury_6StunningBodiesDrawingPoses+v4.jpg?content-type=image%2Fjpeg">
It forced me to actively recall information and make iterative changes. I think this is what sets this course apart from others, because it teaches you the habit of reinforcement learning rather than just teaching you what can be learnt from books. If you can get through this stage with healthy habits you will improve by leaps and bounds.
<img src="https://images.squarespace-cdn.com/content/6199073473e2f921c31c3238/b0a0680b-f45e-44ba-bfa8-3722d8529bf1/gury_6StunningBodiesClothes.jpg?content-type=image%2Fjpeg">
Modules 10-13 is probably what I imagine most people is here for, to draw like Oridays sensei. It goes into depth of his techniques and processes of his illustrations. By the end you'll finally have the skills to draw your anime waifu.
<img src="https://images.squarespace-cdn.com/content/6199073473e2f921c31c3238/c9471c4f-e7fa-4610-a17f-73c269cb1031/gury_14BangerIllustrations.jpg?content-type=image%2Fjpeg">
Overall, my biggest takeaway is hands down how Oridays presents the learning experience, especially for those on a "self taught artist" journey this will help immensely.”

“…A perfect framework for someone who wants to take art more seriously.”

Fishy🐟
Freelance Illustrator
@fishofthelakes • 25K Followers
-
“This course is a very all encompassing course that is well geared towards teaching how to learn the complexities of drawing in an anime art style!
It also teaches the skill of learning effectively, and managing the mental and emotional side of things too!
It's one of the resources that I wish I had as a beginner artist and is a perfect framework for someone who wants to take art more seriously to build off.
Despite the accelerator name, it's not a 'get rich quick' scheme, but encourages a prolonged, consistent effort to achieve the goals I (or you) want. The course does require a good effort to be put in! It's drawing after all!
Personally, going through the lessons has allowed me brush up on the fundamentals of drawing characters. What impressed me was how it's separated into bite sized portions that don't feel overwhelming when you're doing the exercises, but when you look back you realised you've done and learned a lot!
This stays true throughout all of the lessons, and by the end of it you'll have gone through everything you need to create illustrations yourself (and will have drawn a whole illustration yourself!)”


So what’s actually inside?
Here’s what the course curriculum looks like:
-
<img src="https://images.squarespace-cdn.com/content/6199073473e2f921c31c3238/82b1d8f1-ccb6-4630-be69-fcd6e26fb820/welcome+2+%28720px+v2%29.jpg?content-type=image%2Fjpeg">
In this introductory segment, you'll get an overview of the course and what's to come.
You'll also learn how to take the course based on your current level and get the most out of it.
Finally, we’ll go through the “Accelerator Mindset” that will significantly speed up the rate at which you improve.
-
One of the most important skills for getting good at art is drawing consistently without losing your motivation or giving up. The moment you stop drawing is the moment your skills stop improving.
That’s why learning how to master your motivation is absolutely critical if you want to get good at art – which is exactly what this module is all about.
<img src="https://images.squarespace-cdn.com/content/6199073473e2f921c31c3238/536ddb3d-07bc-4a79-b882-bc24baa4f9d8/motivation+4.jpg?content-type=image%2Fjpeg">
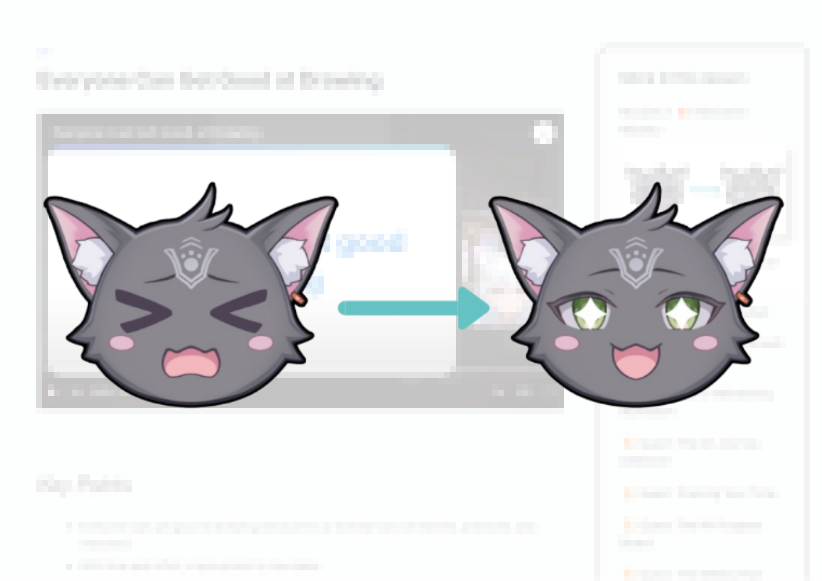
We’ll start by locking in the foundation: why anyone can get good at drawing – and how to develop a real growth mindset (and avoid a false one).
<img src="https://images.squarespace-cdn.com/content/6199073473e2f921c31c3238/d0dd0c53-a156-489e-a110-ae80b7b292c3/motivation+2+v2.jpg?content-type=image%2Fjpeg">
Next, you’ll learn how to maintain motivation by creating “feedback loops” that make it easy to see the progress you’re making.
You’ll also learn the difference between a North Star and a goal, and how to set them – so you don’t waste time doing the wrong things and always have clarity on what to do next.
Lastly, I’ll teach you how to overcome the common motivation killers: distractions, procrastination, unhealthy comparison, setbacks, criticism, and perfectionism – with practical tips and quests you can apply immediately.
<img src="https://images.squarespace-cdn.com/content/6199073473e2f921c31c3238/3fe6435f-8144-4fd5-a83a-ae6c4153b051/motivation+3.jpg?content-type=image%2Fjpeg">
By the end of this module, you’ll have the tools and techniques needed to stay motivated effortlessly and finally hit your art goals.
-
Now that you’re set up to stay motivated and consistent, it’s time to build the core skills that make your drawings feel 3D and believable – so your characters don’t look flat.
We’ll kick off with the basics of perspective, so you understand what’s happening instead of guessing.
<img src="https://images.squarespace-cdn.com/content/6199073473e2f921c31c3238/f5458bee-89f6-4b4f-b459-b139766b84b5/perspective+1.jpg?content-type=image%2Fjpeg">
Then you’ll learn how to draw boxes in 1, 2, and 3-point perspective, because the box is the foundation for drawing everything else, including characters.
Next, we’ll level up into box turnarounds – rotating it from different angles – so you develop the intuition to draw forms in 3D space freehand. And I’ll show you how to check your accuracy, so you don’t repeat mistakes for months without realizing it.
<img src="https://images.squarespace-cdn.com/content/6199073473e2f921c31c3238/5737eaeb-0e1c-4534-b00d-c58a7b43a8f3/perspective+3.jpg?content-type=image%2Fjpeg">
After that, you’ll learn two simple measuring techniques that make construction way easier.
Finally, we’ll lock in the key principle that lets perspective support your drawings instead of making them stiff.
By the end of this module, you’ll be able to draw boxes confidently from any angle, and use perspective as a tool to make your characters feel solid, three-dimensional, and believable – even when you’re sketching freehand.
<img src="https://images.squarespace-cdn.com/content/6199073473e2f921c31c3238/7bf6060d-10c4-422a-8190-81f6435ba6ca/perspective+5.jpg?content-type=image%2Fjpeg">
-
Now that you can draw the box from any angle, it’s time to apply that skill where it matters most in anime art: the head. Because no matter how well you draw everything else, if the face looks off, the whole character will look off.
We’ll start by going through the head drawing process, and which part you should focus on to improve the fastest.
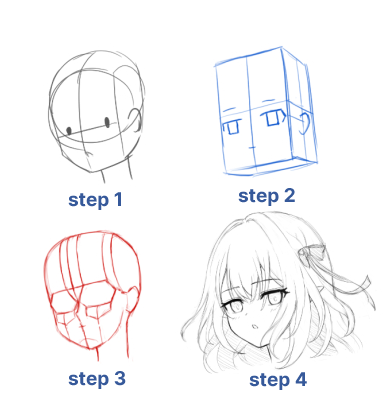
<img src="https://images.squarespace-cdn.com/content/6199073473e2f921c31c3238/abdf4e60-3d78-4a4f-960a-f26f2789c17c/head+drawing+process+2.jpg?content-type=image%2Fjpeg">
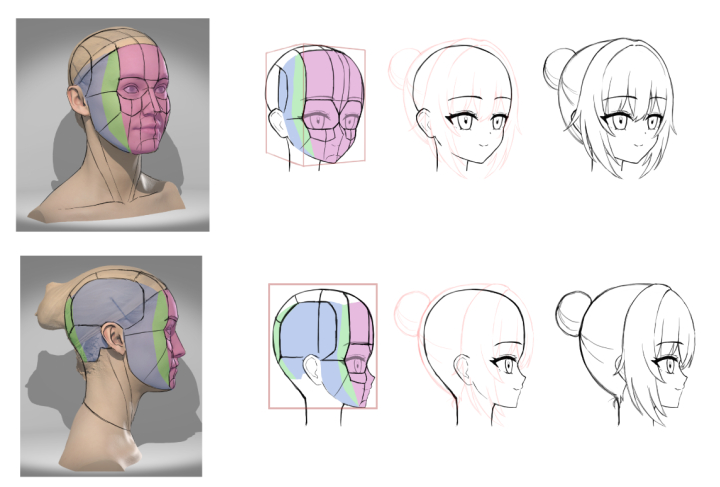
Then you’ll learn how to simplify the structure of the head into three planes, and we’ll do a deep dive on the different face parts.
First, we’ll cover the eyes – their structure and the different types based on where they fall on the 'Eyelid Angle Spectrum'.
Then we’ll cover the nose, mouth, and ears. I’ll show you how to stylize each part and exactly where to place them on the face.
You’ll also learn how to adjust facial features to shift a character’s impression.
After that, you’ll learn how to draw the Head Box and stylized mannequin of the head – so you can draw it accurately from any angle.
<img src="https://images.squarespace-cdn.com/content/6199073473e2f921c31c3238/2eb0f3c8-35a0-406d-bf37-9d25e7275dbb/head+structure.jpg?content-type=image%2Fjpeg">
Then I’ll teach you how to use the Blind Method to quickly learn any art style you want, and help you apply what you learn through step-by-step quests.
Next, we’ll go through how to draw the hair – its different parts, structure, how to stylize it, and practical techniques you can apply immediately to draw it well.
Finally, you’ll learn how to draw different facial expressions and emotions, so you can create characters that feel alive.
<img src="https://images.squarespace-cdn.com/content/6199073473e2f921c31c3238/07caee43-09e0-4436-a742-5dd3d92f4dab/head+1.jpg?content-type=image%2Fjpeg">
By the end of this module, you’ll be able to confidently draw the head and hair well from any angle, in any style you want, with expressions full of life.
-
Note: This course is focused on female characters. See the FAQ section for more details.
Now that you can draw the head freely, it’s time to tackle the body.
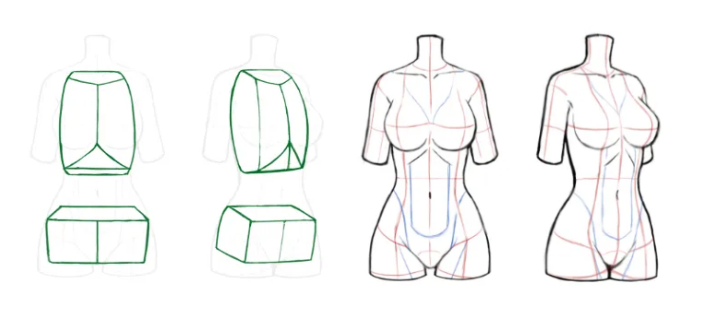
We’ll start by going through the 3-step process for drawing the body.
<img src="https://images.squarespace-cdn.com/content/6199073473e2f921c31c3238/963cad00-3d88-4a99-b38f-15db77dcbbf4/body+process+2.jpg?content-type=image%2Fjpeg">
Next, you’ll learn how to nail the proportions of the body and how to stylize it.
Then we’ll go through each major part – torso, legs, arms, hands, and feet – covering the anatomy and key muscles that actually matter for anime art, plus the most important things to watch out for when drawing them.
<img src="https://images.squarespace-cdn.com/content/6199073473e2f921c31c3238/1362236f-0c84-4086-95c1-beed63c1179a/body+2.jpg?content-type=image%2Fjpeg">
You’ll also learn how to simplify each part of the body into basic shapes, and draw it as a stylized mannequin.
Along the way, you’ll have quests that guide you to draw each body part one at a time, before putting everything together into the full figure – so you can learn to draw the body without getting overwhelmed.
<img src="https://images.squarespace-cdn.com/content/6199073473e2f921c31c3238/622f5bc1-c597-4722-af64-9d080ff51bbb/body+rotation+v3.jpg?content-type=image%2Fjpeg">
By the end of this module, you’ll be able to confidently draw the full body with stylized proportions - and rotate it from any angle.
-
Now that you can draw the whole body, it’s time to bring it to life by learning how to place it in 3D space and pose it.
First, we’ll go through how to draw the figure in perspective correctly using the Box Placement Method. This will help you fix the classic “floating character” problem, where the character isn’t on the ground properly and looks off compared to everything else in the scene.
<img src="https://images.squarespace-cdn.com/content/6199073473e2f921c31c3238/ea23d118-e112-4bd6-9917-385a176e55bd/Box+Placement+Method+4.jpg?content-type=image%2Fjpeg">
Next, you’ll learn the 3 Posing Elements, so you can come up with appealing poses that have depth and story to them.
Then I’ll teach you the best practice method for getting good at poses – a learning loop that helps you improve fast and makes what you learn actually stick.
<img src="https://images.squarespace-cdn.com/content/6199073473e2f921c31c3238/75d58f77-282f-4e56-81c6-f7487de4ebf4/poses.jpg?content-type=image%2Fjpeg">
Finally, we’ll tackle clothing and wrinkles: what they really are, the principles behind them, the key things to watch out for, and how to stylize them for anime art.
<img src="https://images.squarespace-cdn.com/content/6199073473e2f921c31c3238/121f20b7-958f-44d2-adc4-024d94480686/wrinkles+3v2.jpg?content-type=image%2Fjpeg">
By the end of this module, you’ll be able to draw full-body poses in perspective, with stylized clothing and wrinkles – and make your characters feel alive.
-
Now that you can draw and pose your characters, it’s time to make them look three-dimensional – with lighting and shading that actually feels believable.
We’ll start with the foundations: what light and shadow really are, how they form, and the different types of shadows.
<img src="https://images.squarespace-cdn.com/content/6199073473e2f921c31c3238/d3ad5a94-0c89-4df9-acff-43033743323b/basic+shape+shading.jpg?content-type=image%2Fjpeg">
Then we’ll cover light sources, how they affect shadows, and the difference between direct and diffuse lighting.
Next, we’ll go through how the material of an object affects the way light and shadow interacts with it – and touch upon value and how it works.
<img src="https://images.squarespace-cdn.com/content/6199073473e2f921c31c3238/66b0431c-fa2e-406c-973e-b0def810d12f/material+properties.jpg?content-type=image%2Fjpeg">
Finally, you’ll learn how to simplify all of this for anime art using the 1/2/3 Shadow System, and how to quickly level up your shading with the ACA Method.
<img src="https://images.squarespace-cdn.com/content/6199073473e2f921c31c3238/6d2c8b85-0abc-4b02-b7b0-79309aae4a10/123+shadows+B%26W+v3.jpg?content-type=image%2Fjpeg">
By the end of this module, you’ll have a clear understanding of how light and shadow work – and be able to shade your characters in a believable way.
-
Now that you understand light and shadow, it’s time to tackle color.
First, we’ll go through what color actually is, where it comes from, and how an object’s color changes depending on the light source.
<img src="https://images.squarespace-cdn.com/content/6199073473e2f921c31c3238/1bfbc666-ead6-4ddf-bbbd-bd263d594400/color+4v2.jpg?content-type=image%2Fjpeg">
Next, we’ll cover the core color fundamentals, and the key color relationships that matter most.
Then you’ll learn how color controls the impression and mood of your art, and the relationship it has with value.
After that, I’ll teach you a simple, reliable method for picking shadow colors – and how to adapt it for different lighting situations.
<img src="https://images.squarespace-cdn.com/content/6199073473e2f921c31c3238/dae20520-4bb1-4ae6-9eed-e450b5d5f6ea/color+2v3.jpg?content-type=image%2Fjpeg">
Finally, you’ll learn the best practice method for getting good at picking and adding colors to your art.
<img src="https://images.squarespace-cdn.com/content/6199073473e2f921c31c3238/bde797e1-cac5-4af8-abb0-f966c3614149/color+3.jpg?content-type=image%2Fjpeg">
By the end of this module, you’ll understand how color works, how to pick shadow colors for any situation, and how to add color to your art in an appealing way.
-
Now that you know how to draw, shade, and color your characters, it’s time to make your art actually look appealing.
Packaging is the skill of combining all the elements of art into a single piece that looks great. It’s like how a director guides the actors, props, lighting, and camera to capture the best shot.
<img src="https://images.squarespace-cdn.com/content/6199073473e2f921c31c3238/32e0e8c7-358d-4aa2-9ce8-24af3756e517/composition.jpg?content-type=image%2Fjpeg">
We’ll start by diving into the first element of packaging: composition.
You’ll learn how to portray your characters and poses in the most appealing way with better camera angles, smarter cropping, and clear positioning.
<img src="https://images.squarespace-cdn.com/content/6199073473e2f921c31c3238/6290bc4d-e091-4d23-9240-9ced17bcc52d/packaging+8.jpg?content-type=image%2Fjpeg">
Then you’ll learn how to avoid tangents that make your art look flat, how to lead the viewer’s eye to what matters most, and how to create a sense of depth in a scene.
<img src="https://images.squarespace-cdn.com/content/6199073473e2f921c31c3238/5f9868b2-cf6c-4418-994f-78e5736a9edb/packaging+3.jpg?content-type=image%2Fjpeg">
Finally, we’ll tackle the second element of packaging: impression.
You’ll learn how to use silhouette and shape language to change the vibe of your piece, and how design choices like proportions, hair, and clothing affect what the viewer feels at a glance.
By the end of this module, you’ll be able to create compositions that read clearly, feel polished, and make your art look amazing.
-
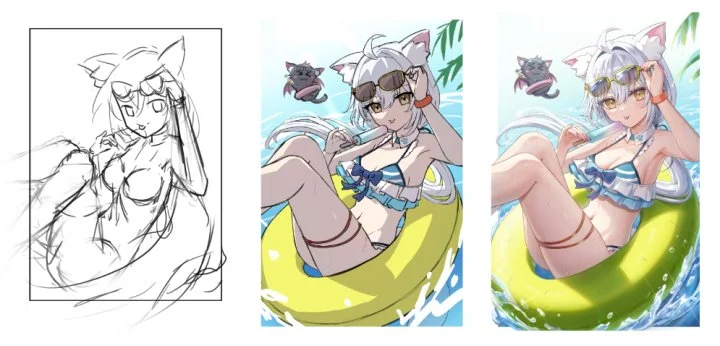
Now that you know how to package your art so it looks appealing, it’s time to start making full illustrations – from idea to final render.
In this module, we’ll break down the illustration process into 3 main stages, and dive into the first one that decides everything: ideation.
First, you’ll learn how to think about originality the right way, so you can come up with fresh concepts that still feel relatable.
<img src="https://images.squarespace-cdn.com/content/6199073473e2f921c31c3238/6026c044-3a2b-499d-92af-3dff36a99068/ideation+1.jpg?content-type=image%2Fjpeg">
Then I’ll give you the system I use to never run out of ideas: the Infinite Art Engine. You’ll be able to pull up inspiration on demand, capture ideas quickly, and filter them down to the best ones – so you’re never stuck wondering what to draw next.
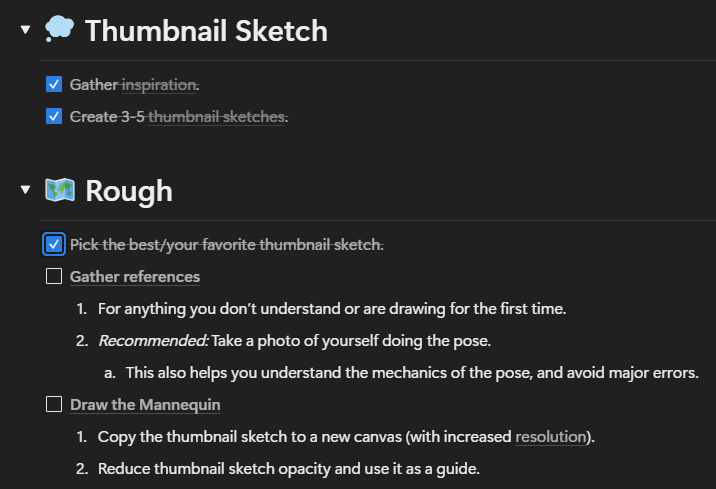
Finally, you’ll learn how to turn your ideas into thumbnail sketches, so you can brainstorm different poses and compositions fast before committing to it.
<img src="https://images.squarespace-cdn.com/content/6199073473e2f921c31c3238/44b004b5-8adc-41a8-a919-706f303bf817/ideation+2.jpg?content-type=image%2Fjpeg">
By the end of this module, you’ll have a reliable system for never running out of ideas, and be able to turn those ideas into thumbnail sketches that are ready for the next step in the process.
-
Now that you know how to come up with strong ideas, it’s time to turn them into a rough.
This is the stage where your illustration starts taking shape, and you lock in the big decisions that determine what the final piece will look like.
You can think of it as creating a preview – so you can plan things out and fix problems before you spend hours rendering.
You’ll start by learning the 4-step process for creating a rough, and how to do each step.
<img src="https://images.squarespace-cdn.com/content/6199073473e2f921c31c3238/a3694b5a-87a9-464c-9b30-027466ce1b32/rough+1-2.jpg?content-type=image%2Fjpeg">
You’ll also learn what canvas size and resolution to use.
Next, we’ll cover how to gather reference the smart way – so you can draw faster, with better accuracy, and less guesswork.
Then you’ll learn how to mock up the color, lighting, and compositional elements — so you can make sure the piece will look great before committing to the final render.
<img src="https://images.squarespace-cdn.com/content/6199073473e2f921c31c3238/d4a40c91-08b1-4915-a68d-092af6395989/aira+summer+-+rough+2.jpg?content-type=image%2Fjpeg">
By the end of this module, you’ll be able to create a color rough that gives you a clear preview of the final piece – and lets you render with confidence.
-
Now that you can create a rough, it’s time to learn how to draw the lineart and add in the base colors.
Because the big decisions are already locked in, this stage is all about execution: great lineart, smart layer setup, and prep that makes painting fast and painless instead of a messy nightmare.
We’ll start with how to draw lineart from your rough – including how to separate your lineart into layers so you can make changes later without breaking everything.
Then you’ll learn the key principles for creating good-looking lineart.
<img src="https://images.squarespace-cdn.com/content/6199073473e2f921c31c3238/99e6ae6c-38cc-4682-86a2-129e6e7b9785/lineart+3.jpg?content-type=image%2Fjpeg">
Next, we’ll cover the practical questions that trip people up – like brush size – plus the tips and tools that speed up the process.
After that, you’ll learn how to separate your illustration into parts and lay in the base colors, so everything is ready for shading and rendering.
<img src="https://images.squarespace-cdn.com/content/6199073473e2f921c31c3238/964f9d92-e48b-45a7-b47e-f65f9085dd83/Parts+Separation.jpg?content-type=image%2Fjpeg">
Finally, I’ll show you alternative ways to create lineart, so you can choose the approach that best suits you and your style.
By the end of this module, you’ll be equipped with the skills to draw great lineart, separate your piece efficiently, and put in the base colors – so painting in the next step feels smooth and stress-free.
-
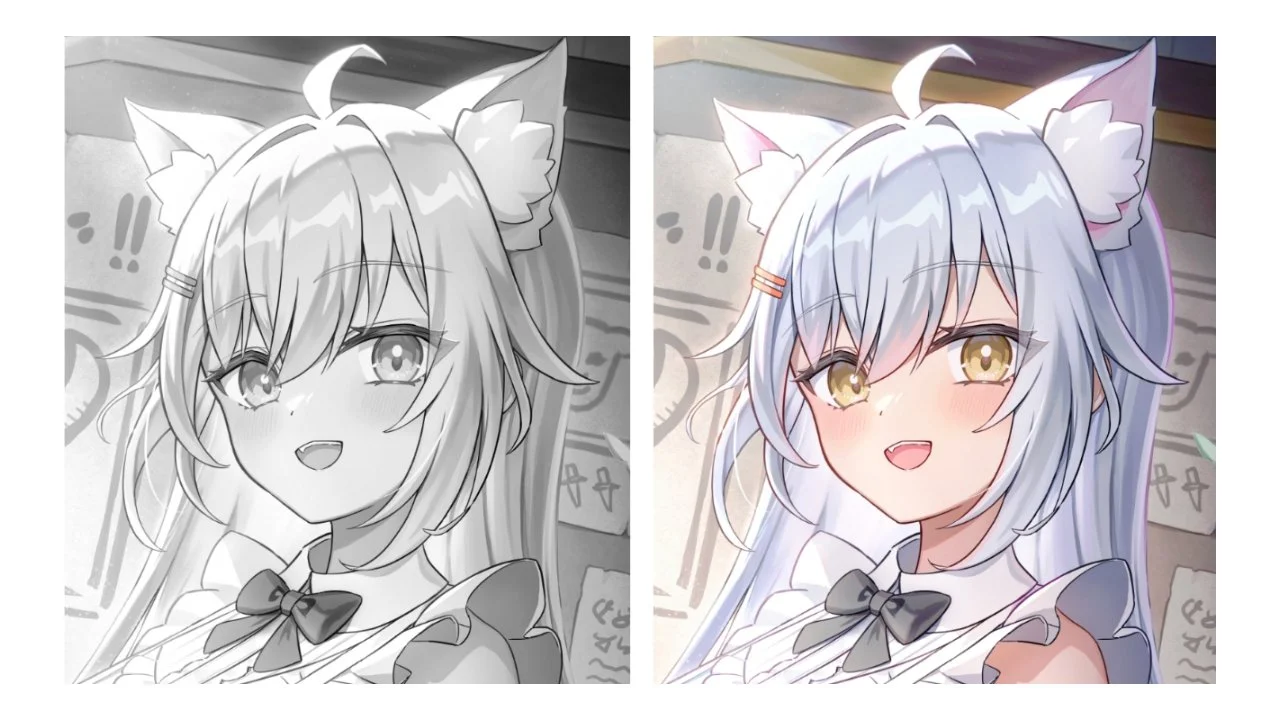
Now that you can draw the lineart and set up the base colors and parts, it’s finally time to paint and render your piece to a polished finish.
You’ll learn the foolproof painting workflow I use to create stunning artwork, and how to apply the 1/2/3 Shadow System to a real illustration – step by step, in full detail.
<img src="https://images.squarespace-cdn.com/content/6199073473e2f921c31c3238/826a5fa1-26c3-42e4-9586-b4c4fdea17d7/General+Painting+Workflow.jpg?content-type=image%2Fjpeg">
We'll also go through how to render stylized eyes in detail, breaking down its structure and key parts.
You’ll also learn how to adjust shadow colors as you paint so they look natural.
Then we’ll cover the role of foreground and background elements in character illustrations, and how to add them in.
Finally, you’ll learn how to add finishing touches that elevate the final impression of your piece.
<img src="https://images.squarespace-cdn.com/content/6199073473e2f921c31c3238/14b63e93-ca55-4310-a218-fd865ee55ea2/aira+summer+-+render.jpg?content-type=image%2Fjpeg">
By the end of this module, you’ll be able to render an illustration with lighting, depth, and polish – and create stunning artwork.
-
<img src="https://images.squarespace-cdn.com/content/6199073473e2f921c31c3238/ef0e35d1-2ee0-47ff-bef8-1178a806cb29/next+step+1+-+720px+v2.jpg?content-type=image%2Fjpeg">
In this final chapter, you’ll learn how to keep improving fast after taking the course – without getting lost, stuck, or burning out.
First, you’ll learn a simple 3-step cycle that helps you level up quickly.
We’ll also go through two ways to figure out the bottleneck holding your art back – and what to do when you have many.
Next, you’ll learn how to build your art style the right way, and a practical method for developing it over time.
Finally, we’ll wrap up with the mindset that helps you keep improving and stay consistent on your art journey for the long term.
By the end of this module, you’ll have a reliable system for continual improvement, a clear next focus, a practical approach for building your style, and a mindset for limitless growth as an artist.
$297
One-time fee
✅ 🧠 The Anime Art Accelerator Curriculum
💡 14 core modules
🎬 99 concise lessons
📽️ 8+ hours of teaching material
📜 50+ quests
Focused on the critical 20% that drives 80% of improvement in anime art.
✅ Level up your art and learn how to:
👩 Draw anime-style heads from any angle using the Box Method
🔥 Beat procrastination and perfectionism, and stay consistent through the Motivation Mastery module
🧍♀️ Draw full bodies and poses with confidence using the Turnaround Method
😄 Create expressions that bring your characters to life with the Expressions Cheatsheet
☀️ Nail anime-style shading and coloring every time using the 1–2–3 Shadow System
🖼️ Take a piece from idea to stunning final render using my Foolproof Illustration Process
✅ 🔑 Lifetime access to all the course material – revisit modules anytime, reuse the references, and keep using the quests as you level up.
✅ 📚 Exclusive References – hard-to-find study assets and cheatsheets (including anime-style head and body turnarounds), so you can learn faster and draw better.
✅ 🎁 Special Bonuses
$297
One-time fee
Hold on... Free bonuses?
Yes! I’m including a bunch of bonus resources to make your learning faster and your workflow smoother 👇
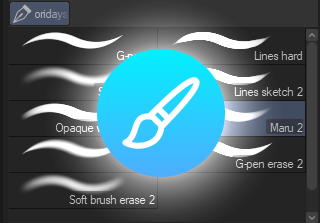
Free Bonus #1
Ori's Brush Set
The exact brushes (and settings) I use for sketching, lineart, painting, blending, and erasing. I'll also show you how to use each brush, so you can use them immediately and not waste time trying to figure them out.
Note: The brushes are for Clip Studio Paint.
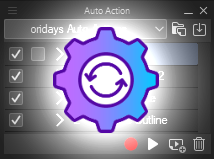
Free Bonus #2
Auto Actions Pack
4 custom auto actions that help you skip some tedious steps in one click, so you can speed up your drawing and learning.
Note: The auto actions are for Clip Studio Paint.
Free Bonus #3
Ori's Workspace Setup
My Clip Studio workspace layout that lets you keep everything clean, efficient, and easy to access while you draw.
Free Bonus #4
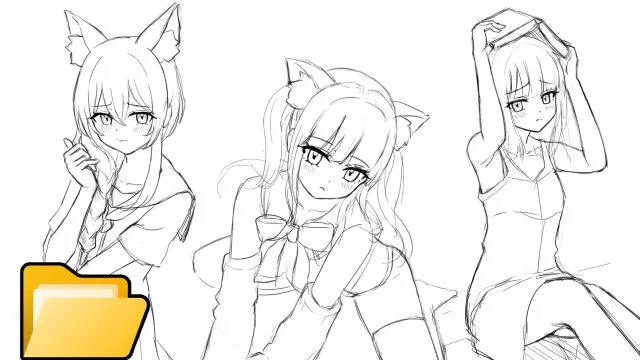
Ori's Sketchbook
A PSD/CLIP file of my sketches with most layers still intact – so you can take a look at each step of my drawing process in detail.
Free Bonus #5
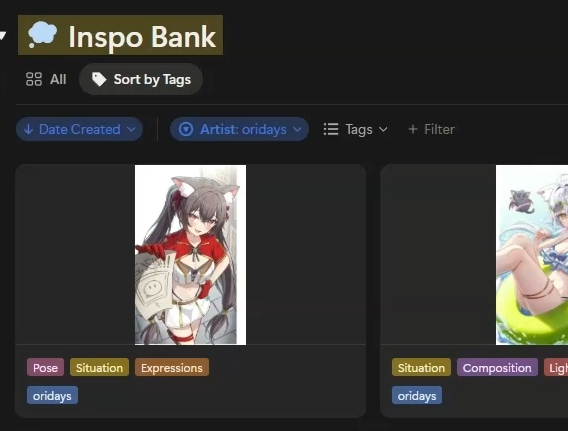
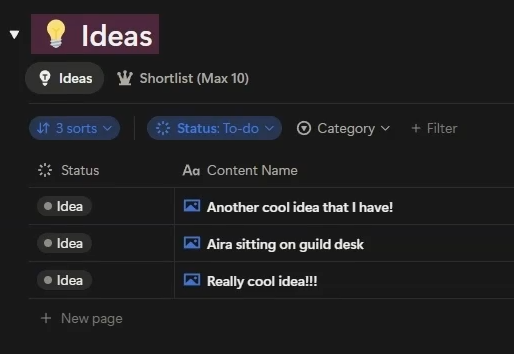
The Infinite Art Engine
A system to help you never run out of ideas, improve your drawing workflow, and stay consistent on the art journey. Best of all, you can simply download and use it right away.
It includes:
A handy "Inspo Bank" that lets you save and organize references with tags, so you can find the right inspiration when you need it in seconds.
An Idea Capture & Shortlist system that lets you quickly capture your ideas so you don't forget, and filter your best ones so you can easily find them when you're ready to draw.
The Complete Illustration Checklist which provides clear steps that you can simply follow to take a piece from idea to final render, so you never get lost or miss a key step.
A Calendar Planner that lets you set a target deadline for finishing a piece, so you can stay consistent with art.

Free Bonus #6
The Ultimate Guide to Gear
A practical guide to the gear that matters on the art journey – tablets, shortcut devices, monitor color calibrators (and more) – including my recommendations and what I personally use.
💖 Ori’s “I’m Glad I Did It” Guarantee
I want this course to be an investment that Future You will thank you for making ✨
I’ve genuinely made this the best course I could possibly make, and I strongly believe it will more than pay for itself – in the time it’ll save you on your art journey, and in the improvement it’ll help you achieve.
But if you’ve completed the entire course and you’re not happy with your experience, email me within 30 days of purchase and I’ll give you a full refund.
Please note: the guarantee only applies if you’ve done all the lessons, at least 50% of the quests, and include your reason for cancellation in the email.
What You’ll Need:
-
This course focuses on digital art, so you’ll need a drawing tablet (or an iPad + Apple Pencil).
If you don’t have one yet, the course includes my Ultimate Guide to Gear, where I share what to look for, as well as my recommendations for tablets and other essential art gear.
-
I use Clip Studio Paint to draw, so the demos and many of the resources (such as painting files and brushes) are in Clip Studio’s format and may not be compatible with other apps.
So to get the most out of the course, I highly recommend using Clip Studio Paint while going through it.
If you don’t have the app yet, you can try it for free (and open the files) with their 3-month free trial.
That said, many of the principles and practice methods you’ll learn apply to anime art in general – regardless of the app you use.So if you have a different preferred app, you can just use Clip Studio while taking the course, then switch back once you’ve completed it.
Frequently Asked Questions
-
It’s structure + application. You don’t improve just by watching – you improve by applying. This course is designed to make it easy to turn what you learn into real skill 💪
You’ll follow a purposefully designed curriculum where the lessons and quests build on each other, helping you improve in a way that’s hard to get from disjointed, random tutorials.
You’ll also get hard-to-find, stylized references to help you learn faster and draw better.
And instead of binge-watching and feeling productive without actually improving your art, the Accelerator is designed to make it easy for you to Learn → Apply → Level up
Ultimately, this course will save you a lot of time on your art journey by speeding up your improvement – and when you see yourself improving, it becomes way easier to stay motivated too.
-
No, this course focuses on female characters (because that’s my specialty), and the demos, references, and examples in the lessons are all geared toward that.
However, the principles and practice methods you’ll learn are universal, and will apply to male characters too.
-
Yes! The course is beginner-friendly and will help you efficiently learn all the core skills you need to get good at drawing anime art.
-
Honestly, I know that might seem short for some people, since many courses try to sell “tons and tons of hours” of footage as a feature.
But the thing is, longer doesn't mean it's better. It's actually much easier to just record and upload hours long of unscripted, unedited footage (think live streams vs videos), and I could have done that too – but I don't think that respects your time.
What you're really looking for is information density, not length. A good teacher, or a well-prepared lesson can teach you more in less time.
One of the reasons my videos take a long time to make is because I obsess about writing the script so its information dense as possible. So I cut out, edit, and rewrite sentences to make it simpler, shorter, and easier to understand.
Similarly, the course also took ages for me to make because I planned and scripted the entire curriculum, and all the lessons have been edited to be concise and fast to watch.
So the video content is intentionally shorter than many other courses, because I don’t believe in making you sit through hours of footage trying to find the gold nuggets (when you could’ve got it in minutes).
-
Yes. The skills and practice methods apply broadly across all anime styles – not just mine.
-
The main focus of this course is characters, so the lessons, demonstrations, and references are centered around that. Backgrounds are touched upon lightly, but they aren’t covered in depth, since in character art they mainly serve as a compositional element.
That said, the principles, methods, and fundamentals you’ll learn for drawing characters also apply to backgrounds and objects.
-
No, the course is entirely self-paced and doesn’t include personalized feedback or 1:1 email support. The upside is you get lifetime access, so you can learn at your own pace and on your own schedule.
-
Yes! All the lessons have English subtitles.
To help you learn faster, there’s also:📝 Key point summaries for every lesson, so you can quickly review what you learned anytime.
🔍 You can search the entire course for lessons that cover a specific topic or keyword, so you can find what you need fast.
🚩 The lesson videos have chapter markers, so you can see what you’ll learn at a glance.
💡 You can even search within videos for keywords, so you can jump to the exact part you need.
-
If you’ve gotten this far on the page, you’re probably interested in the Accelerator – but are having trouble deciding whether to invest in it or not.
So I wanted to share a simple decision-making framework I personally use when I’m on the fence about something:
If buying the course costs you, say, ~10 hours of work at your job…
…and the Accelerator saves you more than 10 hours on your art journey by:
removing the guesswork,
speeding up your improvement,
and helping you avoid wasting time learning the wrong things (that you’d have to unlearn again later)…
…then it’s a good time trade.
The course gives you more back than what you pay for it.
My ambitious goal when making it was this:
If it takes you 10,000 hours to get really, really good at art, I want the Accelerator to save you 1,000 hours throughout your art journey by equipping you with the most effective lessons and practice methods – and helping you improve as fast as possible.
Now, there’s obviously no way to figure out the exact number of hours it’s going to save you personally, and I can’t guarantee a specific number.
But I can guarantee that you’ll be glad you did the course, and Future You will thank you for it.
And as mentioned earlier on the page, if you’ve completed the entire course and you’re not glad you did it, you can email me within 30 days of purchase (with the reason why), and I’ll give you a full refund.